
How to Set Up a Personal Home Server on a Budget
Imagine this: You’re on vacation, you need an important file from your home computer, and you’re paying $10 a month for cloud storage that barely holds everything. Or you’re streaming a movie and your subscription just hiked up—again. Or maybe you’ve always wanted your own private, secure digital space that no corporation owns or monitors.
A personal home server solves all of this — and in 2025, setting one up has never been more accessible, more affordable, or more powerful.
Most people hear “home server” and picture expensive rack-mounted hardware humming in a dedicated server room. The reality is far simpler. A home server can be an old laptop under your bed, a $60 mini PC from eBay, or a Raspberry Pi the size of a credit card. What matters isn’t the hardware — it’s knowing how to use it.
This guide walks you through everything: hardware selection, operating system choices, software setup, networking, security, and real-world use cases. By the end, you’ll know exactly how to build a capable, always-on home server for well under $200 — and possibly much less.
What Is a Personal Home Server, Exactly?
A home server is simply a computer that runs 24/7 on your local network, providing services to your other devices. Unlike a regular PC that you turn on when needed, a server is always available — ready to store files, stream media, run applications, or respond to requests from anywhere in the world.
The key difference between a home server and a regular computer comes down to purpose and uptime. A server is optimized to do one or more specific jobs reliably, continuously, and quietly in the background.
Common Home Server Use Cases
- Personal cloud storage — Replace Google Drive or Dropbox with Nextcloud
- Media server — Stream your movie and music library with Plex or Jellyfin
- Network-wide ad blocking — Pi-hole blocks ads on every device in your home
- VPN server — Secure remote access to your home network from anywhere
- Home automation hub — Run Home Assistant for smart home control
- Game server — Host private Minecraft, Valheim, or other game servers
- Website hosting — Host personal projects, portfolios, or small websites
- Backup server — Automated backups for all your devices
- Development environment — Run databases, test apps, and CI/CD pipelines locally
You don’t need to do all of these at once. Start with one use case, get comfortable, and expand over time.

Step 1: Choosing the Right Hardware for Your Budget
This is where most beginners overthink things. The hardware you need depends entirely on what you plan to run. Let’s break down your options from cheapest to most capable.
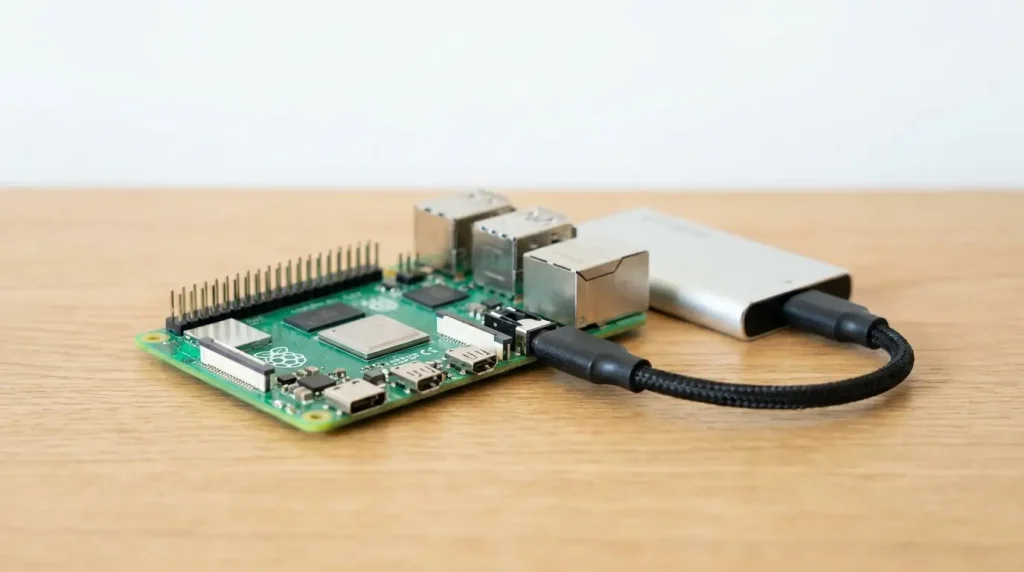
Option 1: Raspberry Pi (Budget: $35–$100)
The Raspberry Pi is the classic beginner’s choice — and for good reason. It’s tiny, draws very little power (around 3–5 watts), runs silently, and is incredibly well-documented.
Raspberry Pi 4 Model B (4GB RAM) costs around $55 and handles light workloads beautifully: Pi-hole, a simple file server, Home Assistant, WireGuard VPN, or a personal blog.
Raspberry Pi 5 (released in 2023) is significantly faster and handles more demanding tasks including multiple Docker containers simultaneously.
Limitations to know: The Pi uses a microSD card for storage by default, which can wear out. Use a quality card (Samsung Endurance Pro, for example) or better yet, boot from an external SSD via USB 3.0.
Best for: First-time server users, low-power setups, smart home automation, network tools like Pi-hole.
Option 2: Old Laptop or Desktop PC (Budget: $0–$50)
If you have an old computer collecting dust, this is your best starting point. A laptop from 2015 with an Intel Core i5 and 8GB RAM is genuinely powerful for home server use.
Why laptops are underrated for servers:
- Built-in UPS (the battery keeps it running during brief power cuts)
- Low power draw compared to desktops
- Already includes a screen and keyboard for initial setup
- Often free if you already own one
The biggest consideration is the hard drive. Old spinning HDDs are slow and fragile. If possible, replace with an affordable SSD ($20–$40 on Amazon) for a dramatic speed improvement and better reliability.
Best for: Beginners with existing hardware, general-purpose servers, anyone who wants to experiment before committing money.
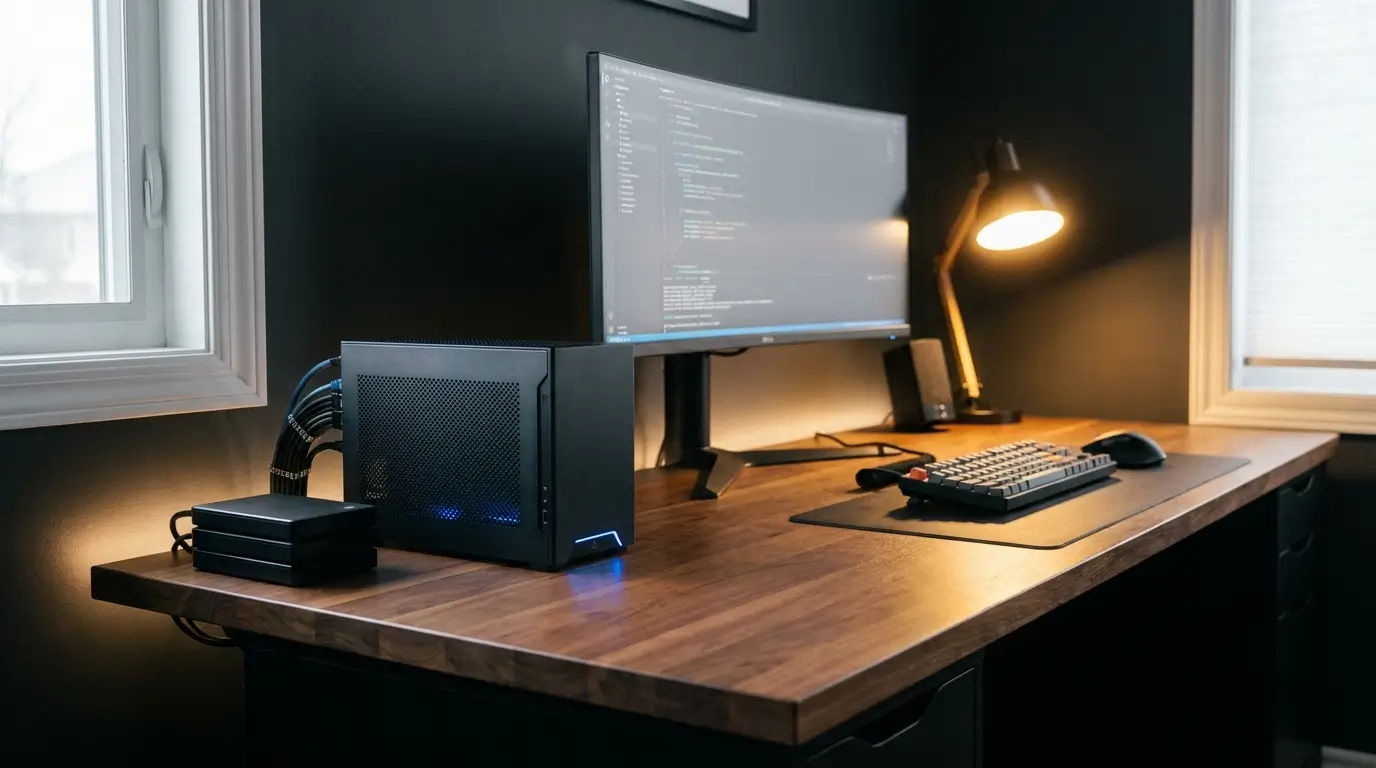
Option 3: Used Mini PC (Budget: $50–$150) ⭐ Recommended
This is the sweet spot for budget home servers in 2025. Small form factor business PCs — like the Dell OptiPlex Micro, HP EliteDesk 800 G3, or Lenovo ThinkCentre M Series — are retired from offices in large quantities and sold cheaply on eBay, Facebook Marketplace, and Craigslist.
What to look for:
- Intel Core i5 or i7 (6th–10th gen) — plenty of power
- 8GB RAM minimum (16GB preferred, easily upgradeable)
- 256GB SSD included (add more storage with an external drive or internal upgrade)
- Intel NIC (network card) — more reliable than Realtek for server use
A typical Dell OptiPlex with an i5 and 8GB RAM goes for $60–$90 on eBay. These machines were built to run 24/7 in corporate environments, so they’re reliable and quiet.
Best for: Anyone serious about running multiple services, Docker containers, a media server, or anything CPU-intensive.
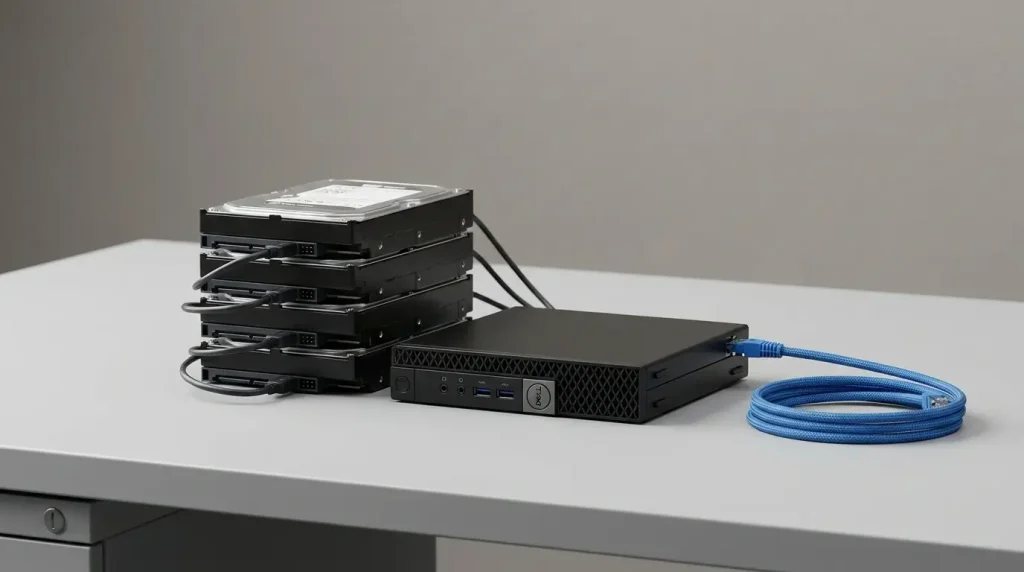
Option 4: NAS (Network Attached Storage) Device (Budget: $150–$400)
Dedicated NAS devices from Synology and QNAP are purpose-built for file storage and come with polished web interfaces designed for non-technical users. They’re energy-efficient and feature-rich out of the box.
The Synology DS223 (2-bay, ~$170 without drives) is an excellent beginner NAS. Add two 4TB WD Red drives (~$60–$80 each) and you have an 8TB personal cloud.
Limitation: NAS devices are primarily built for storage. Running general-purpose applications or Docker containers is possible but more limited compared to a full Linux server.
Best for: Users who primarily want network storage and easy setup without command-line work.
Hardware Comparison Table
| Hardware | Cost | Power Draw | Performance | Best Use Case |
|---|---|---|---|---|
| Raspberry Pi 4 | $55–$70 | ~5W | Light | Pi-hole, VPN, IoT |
| Raspberry Pi 5 | $80–$100 | ~8W | Medium | Docker, Home Assistant |
| Old Laptop | $0–$50 | 20–45W | Medium-High | General purpose |
| Used Mini PC | $60–$150 | 15–35W | High | Media, Docker, multi-service |
| NAS Device | $150–$300+ | 15–25W | Medium | File storage, backup |
Step 2: Selecting Your Operating System
Your OS is the foundation everything else runs on. For home servers, Linux is the overwhelming choice — it’s free, stable, secure, and has excellent server tooling.
Ubuntu Server LTS
Best for: Beginners, general purpose
Version: Ubuntu 24.04 LTS (Long Term Support — 5 years of updates)
Ubuntu Server is the most documented Linux distribution on the planet. Whatever problem you run into, someone has already solved it and posted the answer on Stack Overflow or the Ubuntu forums. It’s the safest choice for first-time server builders.
Debian
Best for: Stability-first users, low-resource hardware
Debian is rock-solid and ultra-conservative — it only ships software after extensive testing. Slightly less beginner-friendly than Ubuntu but excellent for machines with limited RAM.
TrueNAS SCALE
Best for: Storage-focused servers, ZFS enthusiasts
TrueNAS is purpose-built for storage and comes with a web UI, ZFS filesystem (the gold standard for data integrity), and built-in Docker/app support. Excellent if storage and data protection are your primary goals.
Raspberry Pi OS (Debian-based)
Best for: Raspberry Pi hardware exclusively
The official OS for Pi, optimized for its ARM architecture. Use the “Lite” (headless) version for server use — no desktop GUI needed.
Unraid
Best for: Media hoarding, mixed drive sizes, Docker
Cost: $49 one-time license
Unraid has a passionate community and an excellent GUI. It’s particularly popular for media servers because it handles mixed hard drive sizes gracefully. Worth the cost if you’re building a serious media server.
Step 3: Essential Software and Services to Install
Once your OS is running, the real fun begins. Here’s how to build out your server’s capabilities layer by layer.
Start With Cockpit — Your Web Dashboard
Before installing anything else, install Cockpit:
sudo apt install cockpit -y
sudo systemctl enable --now cockpit.socket
Cockpit gives you a beautiful web-based dashboard to monitor CPU, RAM, storage, network activity, and manage services — all from your browser at http://your-server-ip:9090. It’s an essential quality-of-life tool.
Install Docker — The Game Changer
Docker lets you run applications in isolated containers. Instead of manually installing and configuring software, you pull a container image and it just works — with all its dependencies bundled in.
curl -fsSL https://get.docker.com | sh
sudo usermod -aG docker $USER
With Docker, deploying a new service takes minutes instead of hours. It’s the single most important tool for home server management in 2025.
Docker Compose for Multi-Container Apps
Most real-world server setups use Docker Compose to manage multiple containers with a single configuration file. Install it alongside Docker and use docker-compose.yml files to define your services declaratively.
Top Applications to Run on Your Home Server
🎬 Jellyfin (Media Server)
The free, open-source alternative to Plex. Stream your movies, TV shows, and music to any device — phone, TV, browser. Unlike Plex, Jellyfin has zero mandatory accounts or subscription fees.
☁️ Nextcloud
Your personal Google Drive. File sync, photo backup, calendar, contacts, notes, and over 200 additional apps. Nextcloud on your own server means your data stays yours — no third-party access, no subscription, no storage limits except your own drives.
🏠 Home Assistant
The most powerful open-source home automation platform available. Integrates with thousands of smart home devices — Philips Hue, Ring, Nest, IKEA, Zigbee devices, and many more. Run it as a Docker container or on dedicated hardware.
🚫 Pi-hole
A network-wide ad blocker that runs as a DNS server. Every device on your network — phones, smart TVs, laptops — gets ad blocking without installing anything on those devices. Setup takes about 10 minutes.
🔒 WireGuard VPN
A modern, fast VPN protocol. Set up WireGuard on your home server and connect to your home network securely from anywhere in the world. Wireguard Easy is a Docker container that wraps WireGuard in a simple web UI.
📷 Immich
Google Photos, but self-hosted and free. Immich offers automatic photo and video backup from your phone, facial recognition, albums, and a beautiful interface. It’s rapidly becoming the go-to self-hosted photo solution.
📚 Calibre-Web
A web-based ebook library. If you have a collection of ebooks, Calibre-Web lets you browse, read, and send books to Kindle from your browser.
Step 4: Storage Planning
Storage is where home servers live or die. Plan carefully upfront.
Internal vs. External Storage
For a mini PC or desktop, you can add internal SATA drives for the best performance and tidiness. For a Raspberry Pi or laptop, external USB 3.0 drives work well for bulk storage.
Drive Types
SSDs are ideal for your operating system and frequently accessed data. They’re fast, silent, and shock-resistant. A 500GB SSD costs $35–$55.
HDDs are best for bulk storage — media libraries, backups, archives. A 4TB HDD costs $60–$90 new. Refurbished drives can be cheaper but carry more risk.
Avoid using microSD cards for anything important. They wear out quickly and aren’t designed for constant read/write workloads.
RAID — Is It Worth It?
RAID (Redundant Array of Independent Disks) lets multiple drives work together. RAID 1 mirrors data across two drives — if one fails, the other has your data.
Important caveat: RAID is not a backup. It protects against drive failure but not against accidental deletion, ransomware, or catastrophic hardware failure. Follow the 3-2-1 backup rule:
- 3 copies of your data
- 2 different storage types
- 1 offsite (cloud or external drive stored elsewhere)
Step 5: Networking and Remote Access
Getting your server accessible beyond your home is where most beginners get stuck. Here are the cleanest solutions.
Option 1: Tailscale (Recommended for Beginners)
Tailscale is a zero-configuration VPN that creates a private mesh network between your devices. Install it on your server and your phone, and you can access your server from anywhere as if you were on the same local network.
Free tier supports up to 100 devices — far more than most home users need. Setup takes literally 5 minutes.
curl -fsSL https://tailscale.com/install.sh | sh
sudo tailscale up
Option 2: Cloudflare Tunnel
Cloudflare Tunnel lets you expose your home server to the internet via a Cloudflare-managed tunnel — without opening any ports on your router. Your server reaches out to Cloudflare; Cloudflare handles incoming traffic. This is both secure and free.
Ideal if you want to host a website, Nextcloud, or Immich publicly without exposing your home IP address.
Option 3: Dynamic DNS (DDNS)
Your home internet IP address changes periodically. Dynamic DNS services like DuckDNS (free) give you a persistent domain name (e.g., yourname.duckdns.org) that automatically updates when your IP changes. Pair this with port forwarding on your router for direct access.
Setting a Static Local IP
Always assign your server a static local IP address so other devices can always find it at the same address. Do this through your router’s DHCP reservation settings using your server’s MAC address.
Step 6: Security — Don’t Skip This
A server with open network access that isn’t secured is a serious risk. Follow these steps before exposing anything to the internet.
SSH Hardening
SSH is how you remotely access your server’s command line. Secure it properly:
1. Disable password authentication — use SSH keys instead
Generate a key pair on your local machine:
ssh-keygen -t ed25519 -C "home-server"
ssh-copy-id user@your-server-ip
Then in /etc/ssh/sshd_config, set:
PasswordAuthentication no
PermitRootLogin no
2. Change the default SSH port from 22 to something less common (e.g., 2222). This dramatically reduces automated brute-force attempts.
3. Install Fail2ban — automatically bans IPs with too many failed login attempts:
sudo apt install fail2ban -y
Firewall Setup
UFW (Uncomplicated Firewall) is straightforward and effective:
sudo ufw default deny incoming
sudo ufw default allow outgoing
sudo ufw allow 22/tcp          # SSH (or your custom port)
sudo ufw allow 9090/tcp        # Cockpit
sudo ufw enable
Only open ports for services you actually use.
Keep everything updated.
sudo apt update && sudo apt upgrade -y
Set up unattended-upgrades for automatic security patches:
sudo apt install unattended-upgrades -y
sudo dpkg-reconfigure unattended-upgrades
Use HTTPS Everywhere
If you’re exposing services to the internet, use HTTPS. Caddy is a web server that handles SSL certificates automatically and free via Let’s Encrypt. It’s dramatically simpler than Nginx for beginners.
Step 7: Power Management and Reliability
A home server that crashes when the power flickers isn’t much of a server.
Uninterruptible Power Supply (UPS)
A UPS gives your server time to shut down gracefully during power outages, protecting your data from corruption. Even a basic APC BE425M ($30–$45) provides enough runtime for a proper shutdown.
Install apcupsd to monitor your UPS and trigger automatic shutdowns:
sudo apt install apcupsd -y
Wake-on-LAN (WoL)
If you don’t want your server running 24/7, Wake-on-LAN lets you power it on remotely. Configure it in your BIOS and enable it in Linux:
sudo ethtool -s eth0 wol g
Then use a WoL app on your phone to wake the server when needed.
Monitor Your Server
Set up monitoring to get alerts if something goes wrong:
- Uptime Kuma — Beautiful self-hosted uptime monitoring. Alerts you via Telegram, Discord, email if any service goes down
- Glances — Real-time system monitoring in your browser
- Netdata — Detailed performance metrics and dashboards
Step 8: Complete Starter Setup — Step-by-Step Checklist
Here’s a consolidated action plan to go from zero to working home server:
Hardware Setup
- [ ] Acquire hardware (used mini PC recommended)
- [ ] Add SSD if not included
- [ ] Connect via ethernet (not Wi-Fi)
- [ ] Optionally add a UPS
OS Installation
- [ ] Download Ubuntu Server 24.04 LTS ISO
- [ ] Flash to USB with Balena Etcher or Rufus
- [ ] Boot from USB and complete installation
- [ ] Set a static local IP in your router (DHCP reservation)
Initial Server Configuration
- [ ] Update system:
sudo apt update && sudo apt upgrade -y - [ ] Install Cockpit for web dashboard
- [ ] Set up SSH key authentication
- [ ] Configure UFW firewall
- [ ] Install Fail2ban
- [ ] Install Docker and Docker Compose
Install Your Core Services
- [ ] Deploy Pi-hole (network ad blocking)
- [ ] Deploy Jellyfin or Nextcloud based on your priority
- [ ] Set up Tailscale for remote access
- [ ] Install Uptime Kuma for monitoring
Backup Strategy
- [ ] Configure automated backups with Duplicati or rsync
- [ ] Test restoration (a backup you’ve never tested is not a backup)
- [ ] Set up at least one offsite backup
Real Budget Breakdown
Here’s what a complete, capable home server setup actually costs in 2025:
| Item | Source | Estimated Cost |
|---|---|---|
| Dell OptiPlex i5 8GB | eBay | $65–$90 |
| 500GB SSD (if not included) | Amazon | $35–$50 |
| 4TB WD Red HDD (media/storage) | Amazon | $75–$90 |
| Ethernet cable (Cat6, 10ft) | Amazon | $6–$10 |
| APC UPS (optional but smart) | Amazon | $35–$50 |
| USB flash drive (OS install) | Amazon | $8–$12 |
| Total (without UPS) | ~$189–$252 | |
| Total (with UPS) | ~$224–$302 |
Software: $0 — all recommended software in this guide is free and open source.
Monthly operating cost: A mini PC at 25W average draw costs approximately $2–$4/month in electricity depending on your local rates.
Compare that to: Dropbox Plus ($10/month) + Plex Pass ($5/month) + a VPN ($5/month) = $20/month or $240/year. Your home server pays for itself in under 18 months — and that’s before you consider the privacy benefits and the absence of subscription price hikes.
Troubleshooting Common Beginner Problems
“I can’t SSH into my server”
Check that SSH is installed (sudo apt install openssh-server), check your firewall (sudo ufw status), and verify the IP address hasn’t changed.
“My server is slow/stuttering when streaming”
Check CPU and RAM with htop. Jellyfin and Plex can direct-play most modern formats without transcoding — ensure your client supports the file format. Use hardware transcoding if your CPU supports it.
“A Docker container won’t start”
Check logs: docker logs container-name. 9 times out of 10 it’s a port conflict or a misconfigured environment variable in your compose file.
“My external drive isn’t mounting after a reboot”
Use the drive’s UUID (not /dev/sdb) in your /etc/fstab. Find the UUID with blkid.
“My internet is slow when Pi-hole is enabled”
Check Pi-hole’s query log for unusual activity. Add upstream DNS servers: Cloudflare (1.1.1.1) and Google (8.8.8.8) work well.
Frequently Asked Questions
Q: Do I need any Linux experience to set up a home server?
A: Basic Linux familiarity helps, but it’s not required. The community around tools like Ubuntu, Jellyfin, and Nextcloud is enormous and beginner-friendly. Most setup guides assume zero prior knowledge.
Q: How loud is a home server?
A: Used mini PCs are near-silent at idle. A Raspberry Pi makes no noise at all (no moving parts). Older desktop PCs can be louder — check reviews before buying.
Q: Is it safe to expose my server to the internet?
A: With proper security (SSH keys, firewall, fail2ban, HTTPS, no exposed root access), yes. Tools like Tailscale and Cloudflare Tunnel make this even safer by handling the network security layer for you.
Q: What’s the difference between Plex and Jellyfin?
A: Both are excellent media servers. Plex has a more polished interface and better app support but requires a free account and charges for some features. Jellyfin is completely free and open source with no accounts required — your data stays 100% on your server.
Q: Can I run a home server on Windows?
A: You can, but it’s not recommended. Windows isn’t designed for server workloads, consumes more resources, requires more reboots for updates, and has worse Docker performance than Linux. WSL2 bridges the gap somewhat but Linux is simply the better tool for this job.
Q: How many services can I run simultaneously?
A: On a used mini PC with 8GB RAM, you can comfortably run 8–12 Docker containers including Pi-hole, Jellyfin, Nextcloud, Uptime Kuma, WireGuard, and more — all simultaneously, with headroom to spare.
Final Thoughts: Start Small, Grow Gradually
A home server is one of the most rewarding tech projects you can undertake. It teaches you real Linux skills, gives you genuine data privacy, saves money on subscriptions, and opens up a world of self-hosted applications that rival — and often exceed — their commercial counterparts.
The most important advice: don’t try to do everything at once. Start with one service. Pi-hole is a fantastic first project — it delivers immediate value to every device in your home and teaches you the basics of Docker and networking. Once that’s running smoothly, add Jellyfin, then Nextcloud, then whatever else catches your interest.
The home server community on Reddit (r/selfhosted, r/homelab) is welcoming, knowledgeable, and full of inspiration. You’ll find setup guides, recommendations, and friendly help whenever you get stuck.
You have everything you need to start. The hardware is affordable, the software is free, and the knowledge is all publicly available. There’s never been a better time to take control of your digital life.
Start today. Your future self — and your wallet — will thank you.
This article is for informational and educational purposes only. Hardware prices, software features, and availability may vary. Always verify compatibility with your specific hardware before purchasing. Open-source software is subject to its own licensing terms.